Best Classic Easy Apple Crisp Recipe In 10 Ingreditions
Best Classic Easy Apple Crisp Recipe In 10 Ingreditions
Apple crisp is a timeless dessert loved for its combination of sweet, tender apples and a crunchy, buttery topping. This comforting treat is easy to make and perfect for any occasion, from holiday gatherings to casual weeknight dinners. In this article, we will share the best apple crisp recipe, along with variations, storage tips, and how to incorporate it into a balanced lifestyle.
Ingredients for Classic Apple Crisp
| Ingredient | Quantity |
|---|---|
| Apples (Granny Smith or Honeycrisp) | 6 cups (peeled, sliced) |
| Granulated sugar | 1/2 cup |
| Brown sugar | 1/2 cup |
| Ground cinnamon | 1 teaspoon |
| Ground nutmeg | 1/4 teaspoon |
| Lemon juice | 1 tablespoon |
| All-purpose flour | 3/4 cup |
| Old-fashioned oats | 1/2 cup |
| Unsalted butter (cold, cubed) | 1/2 cup |
| Salt | 1/4 teaspoon |
Step-by-Step Instructions
1. Prepare the Apples
- Preheat your oven to 350°F (175°C).
- In a large bowl, toss the sliced apples with granulated sugar, cinnamon, nutmeg, and lemon juice.
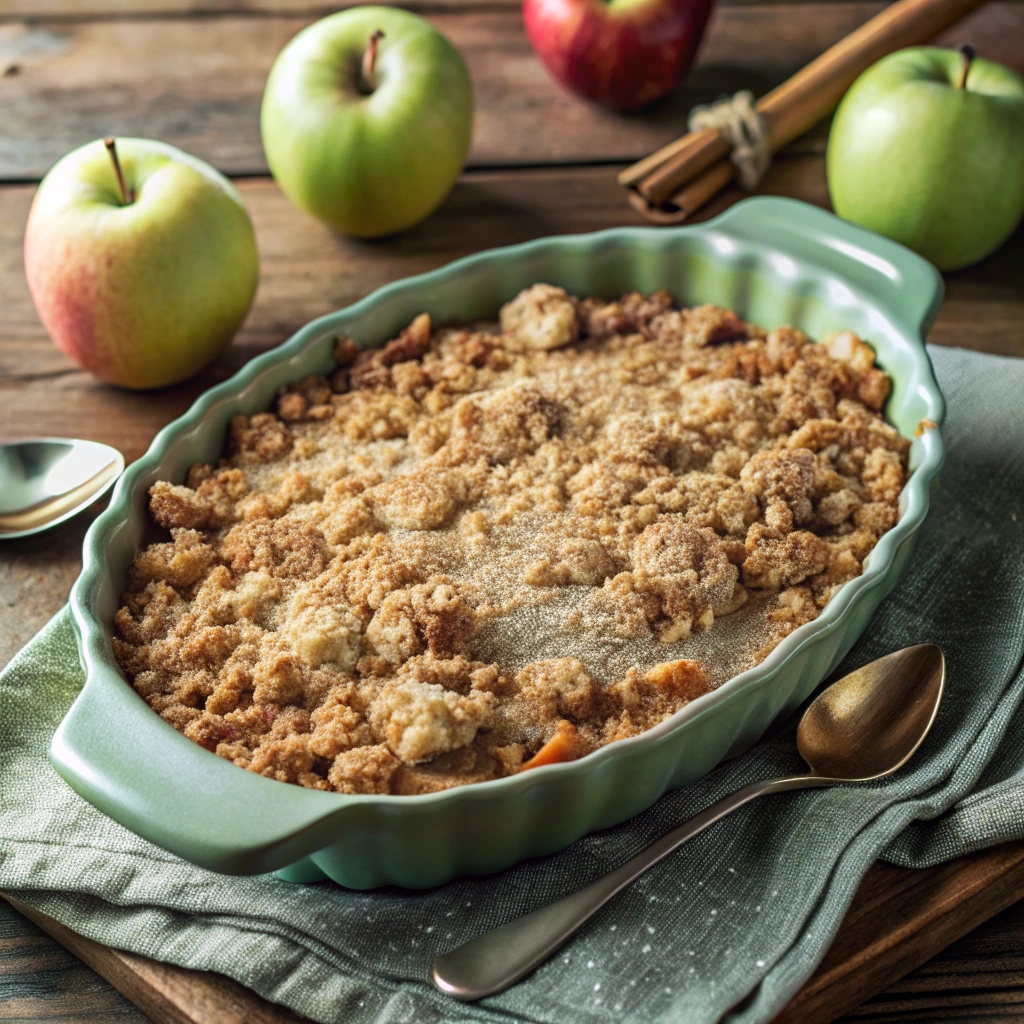
- Spread the apple mixture evenly in a greased 9×13 inch baking dish.
2. Make the Crisp Topping
- In another bowl, mix flour, oats, brown sugar, and salt.
- Cut in the cold, cubed butter using a pastry cutter or your fingers until the mixture resembles coarse crumbs.
3. Assemble and Bake
- Sprinkle the crisp topping evenly over the apples.
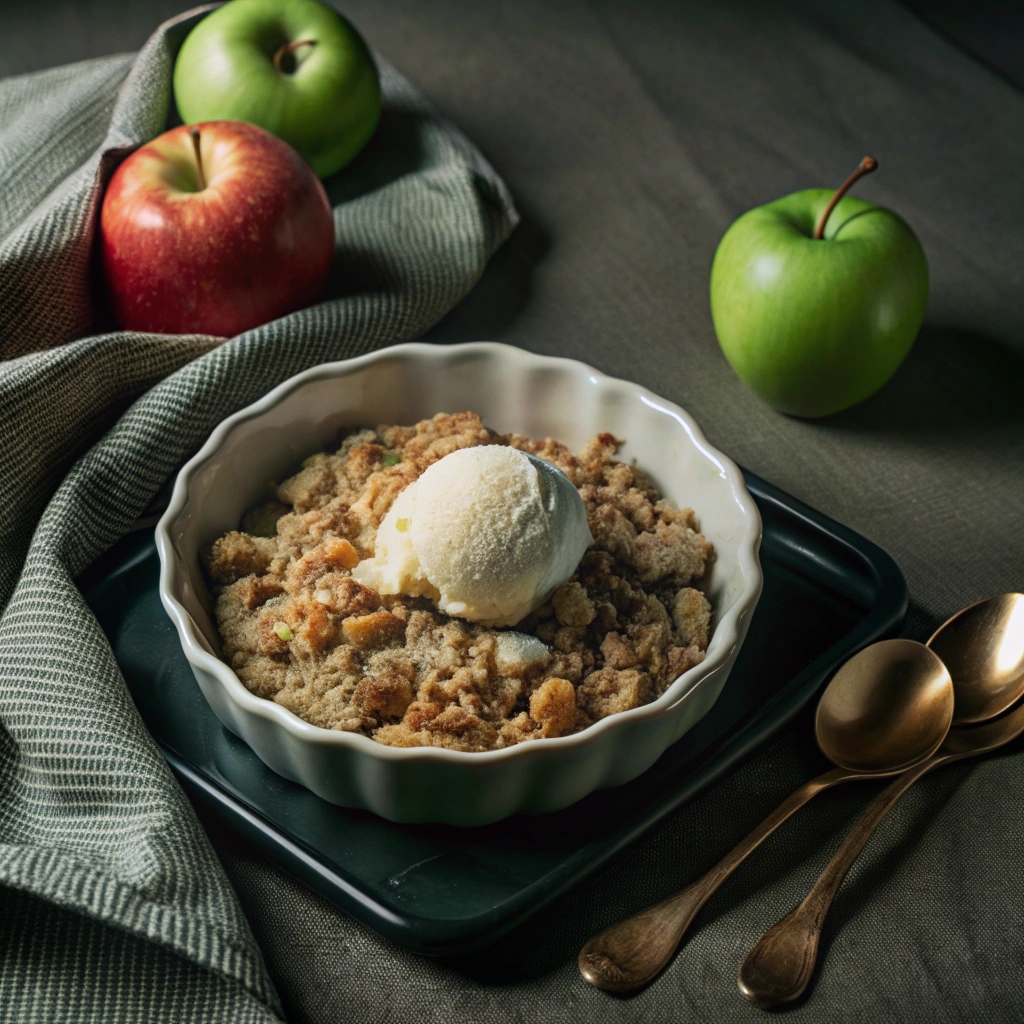
- Bake for 35-40 minutes, or until the topping is golden brown and the apples are tender.
- Allow it to cool slightly before serving.
4. Serve and Enjoy
- Serve warm with a scoop of vanilla ice cream or a dollop of whipped cream.
Advantages of Apple Crisp
- Simple Ingredients: Made with pantry staples.
- Easy to Make: Minimal prep time and no complicated techniques.
- Versatile: Can be customized with different fruits or nuts.
- Crowd-Pleaser: Perfect for gatherings or family dinners.
- Great for Leftovers: Tastes just as good the next day.
Disadvantages of Apple Crisp
- High in Sugar: May not be suitable for low-sugar diets.
- Calorie-Dense: Butter and sugar increase the calorie content.
- Not Gluten-Free: Contains flour and oats (unless using gluten-free versions).
- Short Shelf Life: Best consumed within 2-3 days.
- Can Be Soggy: If overcooked or stored improperly.
How Apple Crisp Fits into a Balanced Lifestyle
- Natural Sweetness: Made with fresh apples rich in fiber and vitamins.
- Moderation is Key: Enjoy in moderation as part of a balanced diet.
- Nutrient-Rich: Provides dietary fiber, vitamins, and minerals.
- Healthier Swaps: Substitute part of the sugar with honey or maple syrup.
- Perfect for Sharing: Enjoy with family or friends to control portion sizes.
Delicious Variations to Try
- Berry Apple Crisp: Add mixed berries for a burst of color and flavor.
- Caramel Apple Crisp: Drizzle caramel sauce over the topping before baking.
- Nutty Apple Crisp: Mix chopped pecans or walnuts into the topping.
- Gluten-Free Option: Use gluten-free oats and almond flour.
- Vegan Apple Crisp: Substitute butter with coconut oil or vegan margarine.
- Spiced Apple Crisp: Add ginger or cardamom for extra warmth.
- Peach-Apple Crisp: Mix sliced peaches with apples for a summer twist.
Tips for Perfect Apple Crisp
- Choose the Right Apples: Use firm, tart apples like Granny Smith or Honeycrisp for the best texture.
- Don’t Overmix the Topping: Keep it crumbly for a crispy texture.
- Balance Sweetness: Adjust sugar to taste depending on apple sweetness.
- Bake Until Golden: Ensure the topping is golden and crisp.
- Serve Warm: It tastes best warm with ice cream or whipped cream.
- Store Properly: Keep leftovers in an airtight container to maintain freshness.
How to Store and Reheat Apple Crisp
- Refrigeration: Store in an airtight container for up to 3 days.
- Freezing: Freeze before or after baking for up to 3 months.
- Reheating:
- Oven: Reheat at 350°F for 15-20 minutes until warm and crisp.
- Microwave: Heat individual portions for about 30-45 seconds.
Apple Crisp Meal Plan
Day 1: Classic Dessert
- Serve warm apple crisp with vanilla ice cream.
Day 2: Breakfast Treat
- Enjoy leftover apple crisp with Greek yogurt.
Day 3: Snack Time
- Have a small serving as an afternoon snack.
Day 4: Holiday Gathering
- Serve with caramel sauce and whipped cream for a festive touch.
Day 5: Lunchbox Surprise
- Pack a small portion for a sweet midday treat.
Apple crisp is a delightful, easy-to-make dessert that never fails to impress. With its perfect balance of sweet, tart apples and a crunchy, buttery topping, it’s sure to become a favorite in your home. Whether served warm with ice cream or enjoyed as a breakfast treat, this classic apple crisp recipe is a must-try.